This post contains affiliate links, for a full description of what that means visit our disclosure page.
Watching episode after episode of HGTV, I got all kinds of inspiration on how to give my house a little makeover. I like to weigh the different options with how much actual work they will require and most of the time, the little voice in my head tells me, “you don’t have the energy for all that” and the thought passes. But when I watched them renovate homes with a simple coat of paint, now that is something I can do.
It only took me about 6 months of convincing myself to take the plunge, but finally one Saturday, I did some research and decided that was going to be the day that I redid our ugly brass fireplace.
Before:
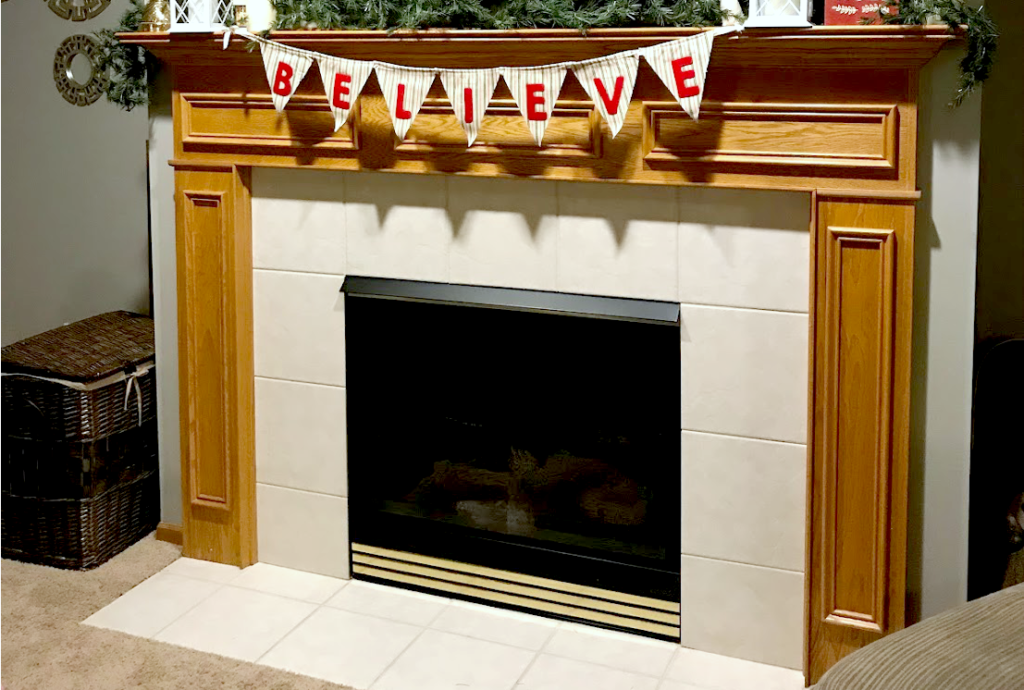
With some simple google searches, I discovered all I would need was a can of high heat spray paint to match our fireplace and it was easy as that. A lot of people used painter’s tape and taped off the areas they didn’t want paint to hit (along with covered it with newspaper) and painted the fireplace just like that. My husband on the other hand, told me it would be just as easy (and cost less in supplies) to take the grates apart and paint them outside.
Cool, I thought, because that meant even less work for me. (Sidnote: I’m not really that lazy, I swear. But you know, momming ain’t easy and I can’t remember the last time I actually slept through the night…)
Pin me for later!
So that’s what we did! In a matter of a couple minutes, he had disassembled our fireplace into a few pieces and set up a little spray paint station outside. After a quick wipe-down of the brass, he sprayed the first coat of this black high heat spray paint and let it dry for a couple hours.
We took that downtime to wipe down the inside of the fireplace and he actually ended up touching up a few spots on the side where the color had faded and we had little white streaks. A simple spray of Windex and the glass looked like new. So far things were shaping up!
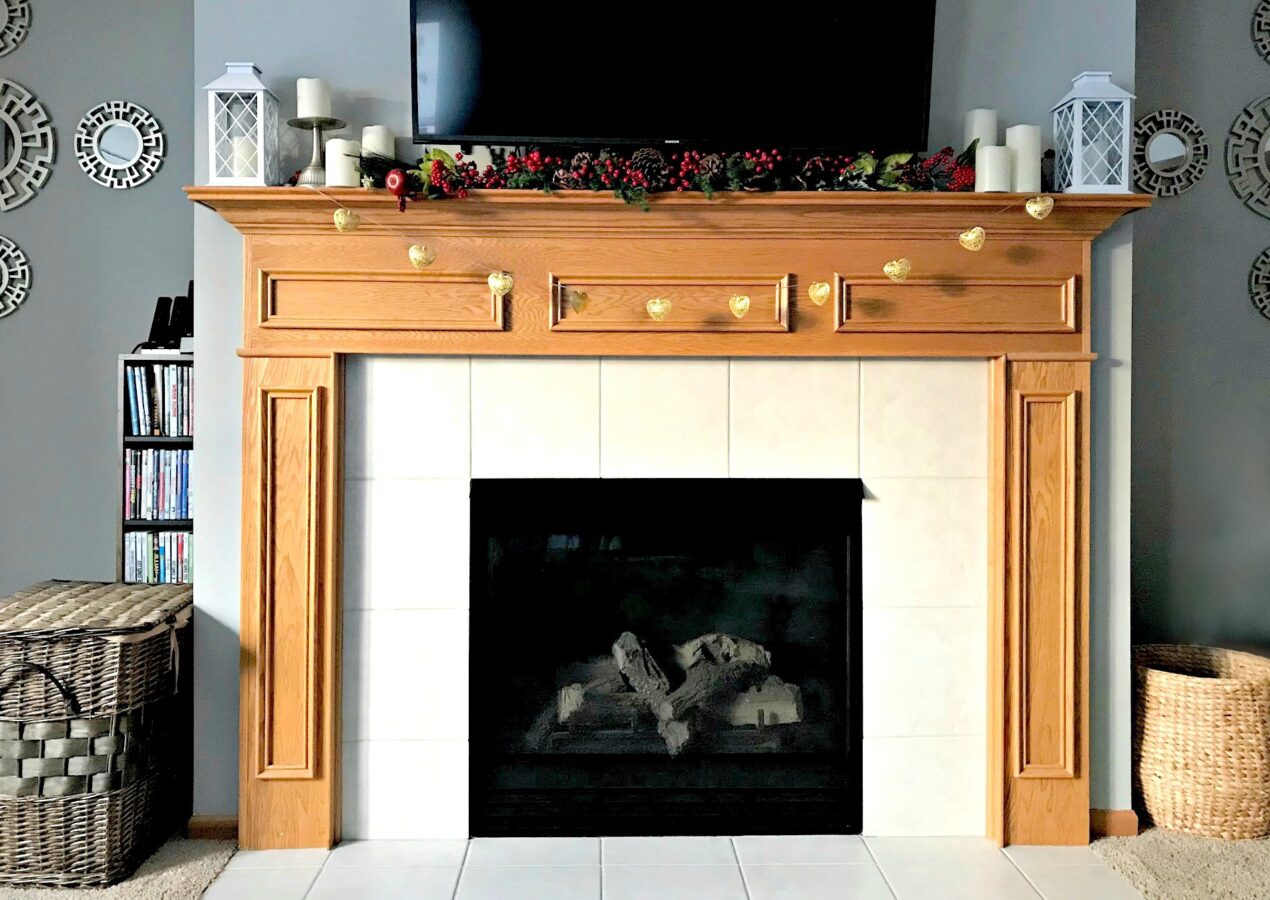
After the first coat on the brass pieces had dried, we sprayed on a second and final coat. It was dry a couple hours later and we re-assembled the fireplace again. I was thrilled with the finished product, and kicked myself for not doing this sooner. It was literally the easiest and cheapest home improvement we have done to date and with as much time as we spend in the living room, it makes a big difference!
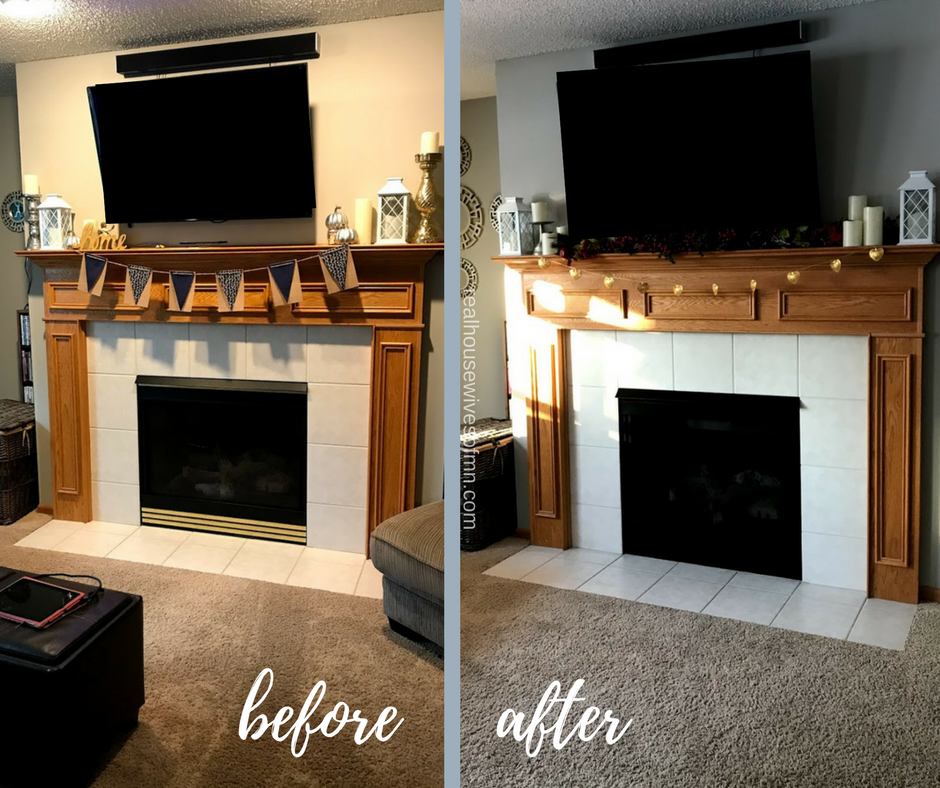
Isn’t it crazy how much of a difference that makes to get rid of the brass? It was something I had overlooked for years, but now that I look at the two pictures next to each other, I cringe at how ugly that brass was. Yuck!
After:
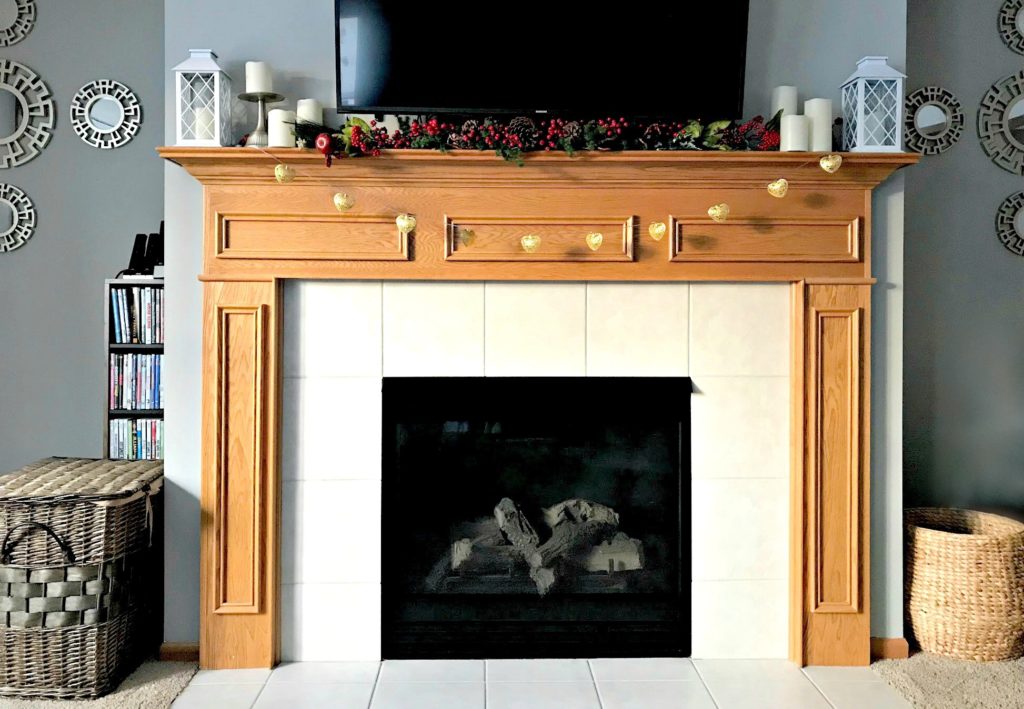
Now my next project is to paint all of our trim white…
Or paint the mantle dark distressed gray. But then we’ll probably have to change up the tile… This could take me a while.
In the meantime, if you’re looking to give your fireplace a little update, this is the spray paint that I used. You can purchase it online or at any home improvement store (like Menard’s or Home Depot). Prices vary but the brand we used was Rustoleum and it worked great!
Hearts,
Sarah

Robynne A Going
How did your husband remove the slats so you could paint them outside? I love this idea
Sarah
Our fireplace piece popped out at the bottom so he was able to take the whole base piece off and bring it outside to paint. Otherwise I have also seen others tape around the area and paint it while it’s still in tact.
Sandy
That looks fantastic! I’ve been thinking of doing this (trying to get the hubby on board)😉 but wondered if after you painted and started a fire is there a paint odor?
Sarah
Hey Sandy!
We never noticed any sort of paint smell at all! I did have to touch it up a little while later after Roomba kept bumping into it, other than that you would never even know it was painted 🙂
Heather @ bizewife
What a great and quick makeover! I also love how you have decorated the mantle around!